We value your privacy!
We use cookies on our website to offer you the best experience. By clicking "accept & close", you agree to the use of all cookies according to our and our . If you do not make a selection, our default cookie settings will be applied. You can change your settings at any time.
Essential cookies: They are required for the proper functioning of the website. First-party- und third-party-cookies: They are optional and are set by us or our subcontractors. Session and persistent cookies: Are automatically deleted when the browser is closed. Persistent cookies are cookies that remain on your computer/device for a certain period of time after the browser is closed.
The Fastlane
The Fastlane in sproof sign is the optimal way to obtain signatures and data from external parties efficiently and scalably. The recipients of the document sign in your branding with just a few clicks. All signed contracts are returned and stored automatically in your dashboard. You save yourself and your end customers time-consuming paper-based processes and media disruptions.
Updated on 04.11.2024

References from the video and further links:
- Tutorial for self-signing
- Tutorial on obtaining signatures ( with workflow)
- Tutorial on the Batch signature
- Tutorial on the audit trail
Step by step instructions
What is the Fastlane?
sproof sign's Fastlane offers a simplified and accelerated solution for collecting signatures and data. With an optimized user interface that focuses on the signature process – view document, fill out form, sign – it reduces distractions and enables fast, straightforward interaction for recipients. Compared to the “classic” editor view, the Fastlane is specially optimized for mobile devices. It also offers a high degree of flexibility in use: Documents can either be shared via email, link or QR code, or embedded as a widget in your own software environment.
The Fastlane also offers a high degree of personalization: For example, you can use your company branding for the user interface and customized user journeys can be configured via so-called Fastlane profiles.
In this tutorial, you will learn how to use the Fastlane via the sproof web application. If you are interested in an API integration of the Fastlane, please contact us by email at sales@sproof.io.
The Fastlane from the sender's perspective
To be able to send a document with Fastlane, you first need a template. You can find out more about templates in the tutorial Create and use templates .
- Click on the three dots in the list view of the dashboard and select “Save as template” or
- Open a document in the editor and click on “Save as template”.

To be able to share a template via Fastlane, you must open it and then click on “Share template”.
Here you now have the following options:
- Specify the e-signature standard with which the document must be signed.
- Place signature placeholders and form fields.

In the next step you can
- Set a due date and
- Define the maximum number of signatures.
Define a maximum number of signatures if you want to ensure that no unforeseen costs are incurred. Please note that with sproof sign, the sending party is always responsible for the costs of the signature.
Then click on “Share template”.

You can now share your template the classic way or use Fastlane to offer your recipients a simplified user interface and an improved signing experience.
- First select the Fastlane profile you want to use. A profile defines which screens (process steps) are shown and which are hidden. Text can also be customized. In this way, the user journey can be customized for different use cases. Fastlane profiles can currently only be created via the API. In the API documentation you will find detailed instructions on how to create Fastlane profiles .
- Share the document as usual via a link, download a scannable QR code or embed a code snippet on your website.

The Fastlane from the recipient's view
The Fastlane is optimized for recipients for both desktop and mobile devices. Depending on the Fastlane profile, which screens are displayed and which are not may vary. This following explanation shows the User Journey with the default Fastlane profile.
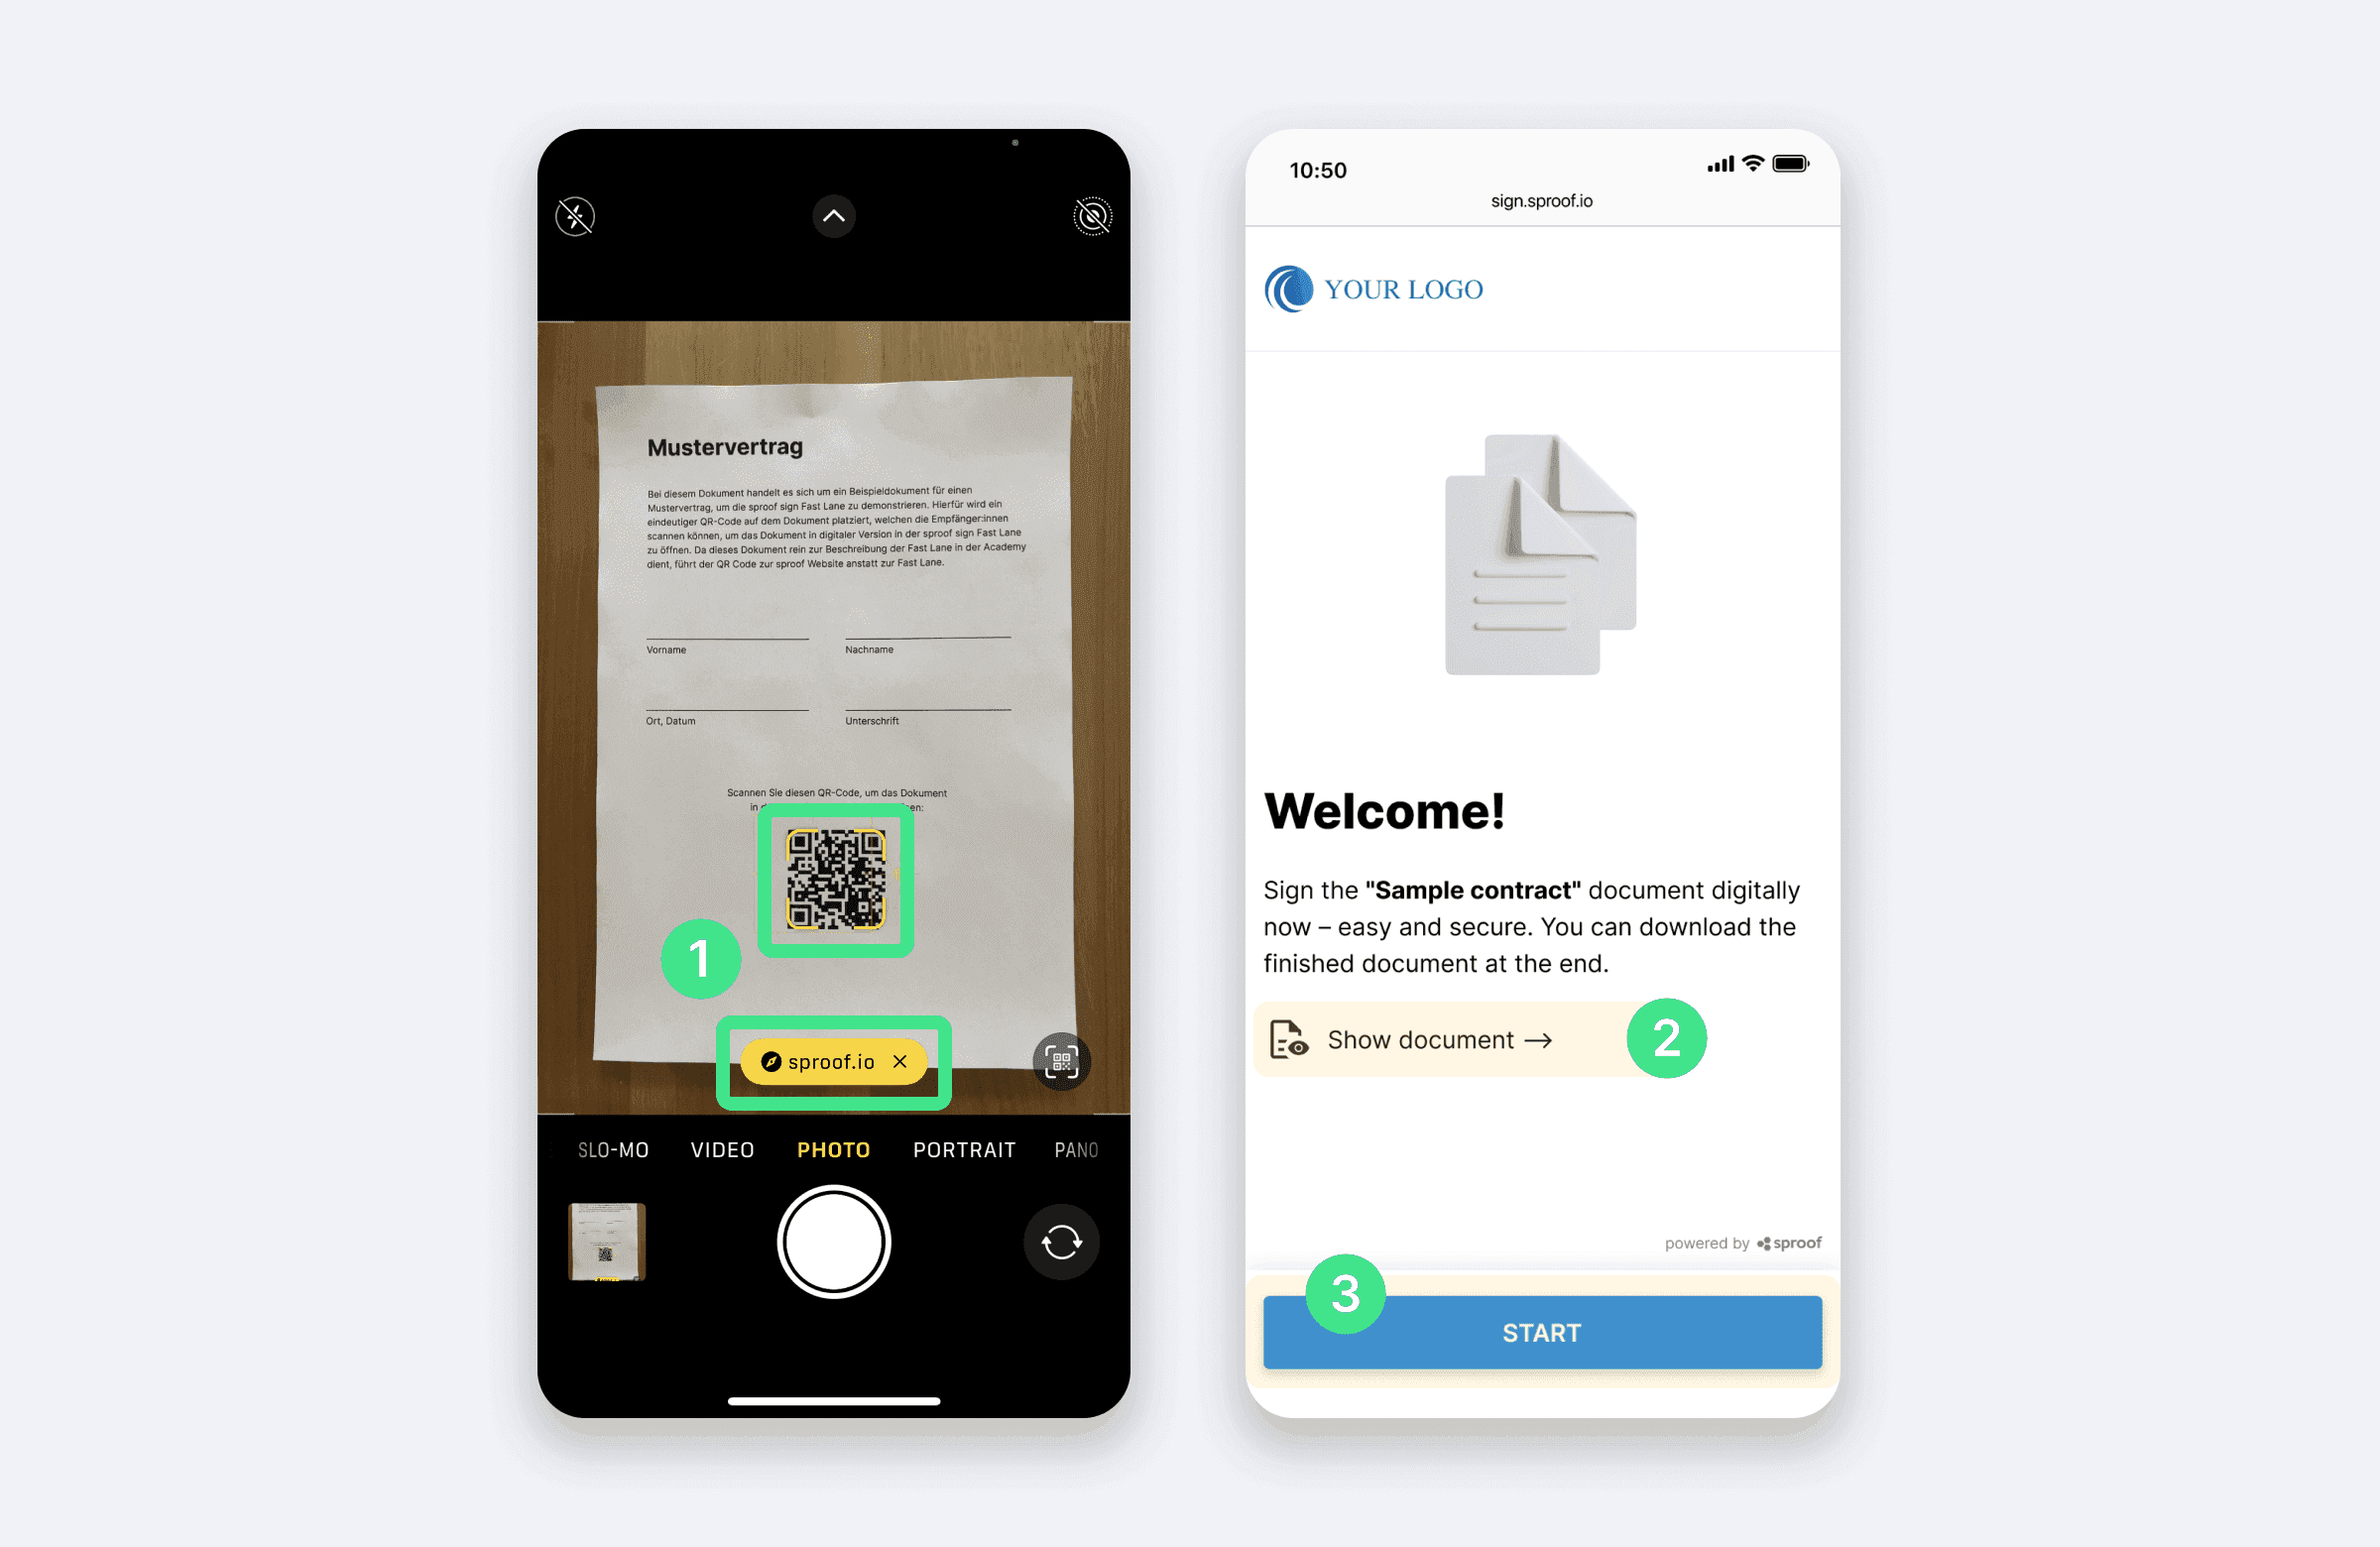
- To open a document in Fastlane, you have either received a link or a QR code from the sender or the document has been embedded on a website via a snippet. Click on the link or snippet provided or scan the QR code with your mobile device to access the Fastlane.
- Click on “View document” to view the document and check the existing form fields and signature position(s).
- Select “Start” to skip the previous step and start filling in the fields directly.

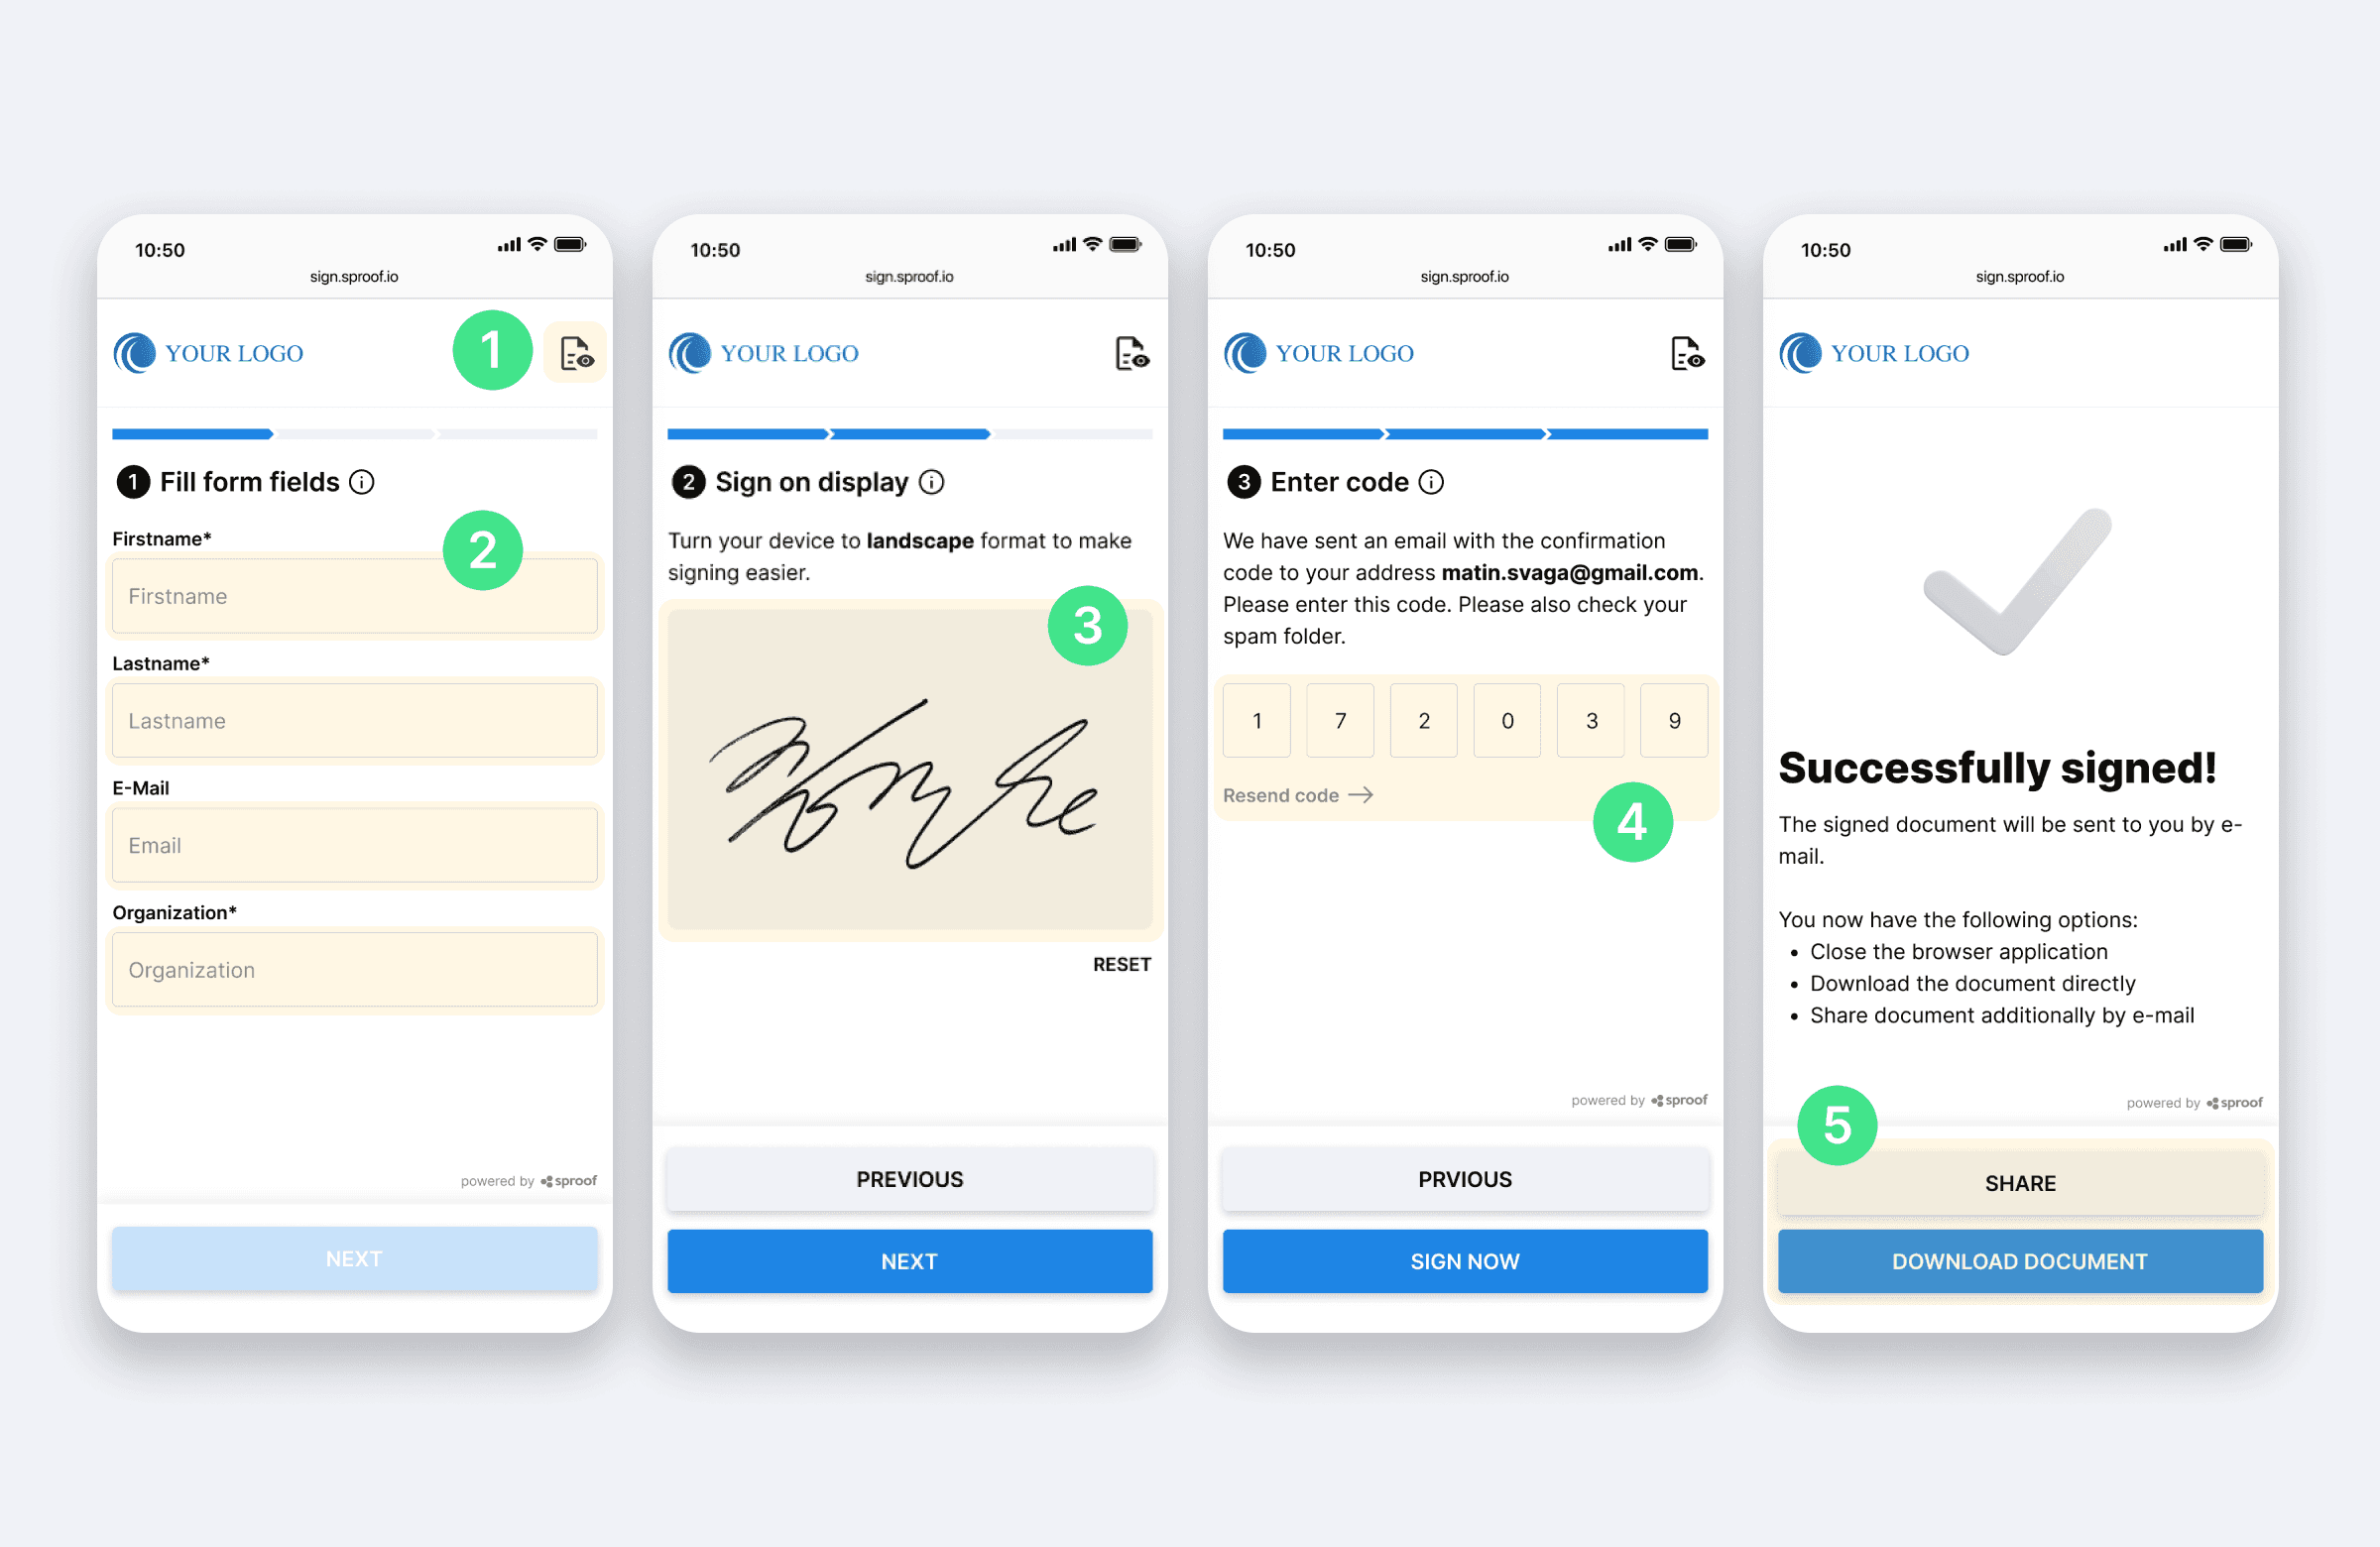
- You can view the document at any time by clicking on the icon in the top right-hand corner.
- You will now be guided through the process step by step. First fill in all the required fields and click on "Next".
- In the second step, draw your signature by hand in the corresponding field and click on "Next".
- To verify your identity, you will receive a 6-digit verification code either by E-Mail or by SMS. Open your E-Mail inbox/SMS and enter the code. If you have not received the E-Mail/SMS, check your spam folder or click on "Resend code". Once you have successfully entered the code, click on "Sign now" to sign the document legally and securely.
- In the last step, you have the option to either close the browser, download the signed document directly or send it to any email address.

